Once you’ve connected your mobile phone (or tablet) as a Tap to Pay device and/or paired a WisePad 3 card reader, you can take payments directly from the WriteUpp Pay app, with no desktop access required.
Before you start
Make sure that:
- You’ve downloaded the WriteUpp Pay app
- You’ve connected:
- Tap to Pay on your phone
- A WisePad 3 card reader (optional)
- You’re logged into the WriteUpp Pay app
Once registered, the app will keep you logged in unless you sign out.
Step 1: Open the WriteUpp Pay app
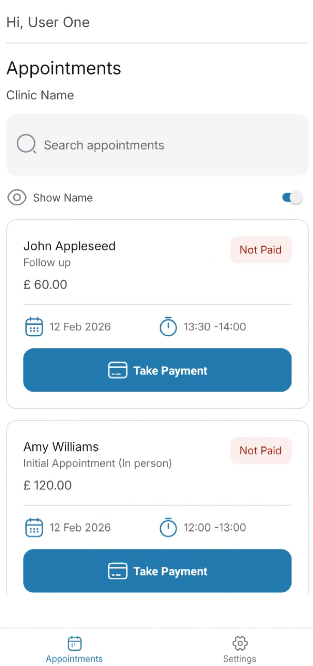
1. Open the WriteUpp Pay app on your device2. You’ll see a list of unpaid appointments and invoices
Each appointment shows:
- Client name
- Appointment type
- Appointment date and time
- Cost
Each invoice shows:
- Client name
- Invoice number
- Cost
You can also search for appointments in the list using the search bar at the top.
The Appointments tab in the app displays today's appointments as well as any bookings made in the last 24 hours, ordered chronologically with the earliest appearing first. If you need to initiate a payment outside of this window, you will need to do so from the desktop version of WriteUpp.
Invoices with part payments will not appear in the app. Part payments must be initiated from the desktop version of WriteUpp.
The app will display appointments and invoices for all users. However, if the ‘Visible to responsible user only’ setting is enabled, appointments and invoices for clients you are not responsible for will be hidden in the app.
Step 2: Choose your preferred payment device (only required if you have a WisePad 3 connected)
By default, the app will use your preferred payment method, which is set in the app under Settings → Preferred payment method

This will be either:
- Your mobile phone (Tap to Pay), or
- Your WisePad 3
-1.png?width=334&height=671&name=IMG_3517%20(8)-1.png)
Step 3: Select the appointment and take payment
1. In the the Appointments tab of the app, find the appointment you'd like to take payment for
2. Tap Take Payment. Note: On iPhone, this button will be 'Tap to Pay on iPhone'
3. You’ll see a 'Connecting to Stripe' screen with the appointment cost displayed: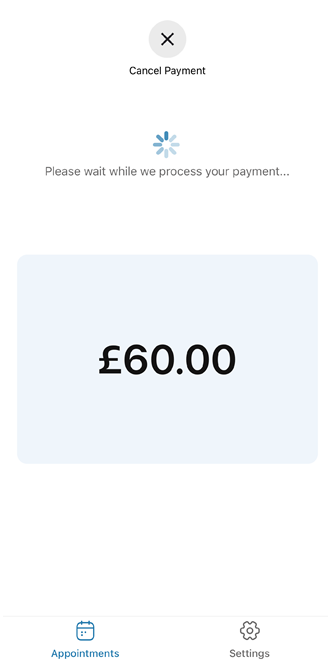
4. Once the connection is established, the built-in ‘Hold card here’ payment screen will appear on your mobile device, or on the WisePad 3 if this is connected and selected as your preferred reader.
If you are taking payment on the Wisepad 3, be sure that is is turned on before you initiate the payment.
Step 4: Take the payment
1. Ask the client to tap their card or device onto the 'Hold card here' payment screen. They may need to hold it in place for a few seconds until the payment is taken.2. The payment will be processed
3. You’ll then see one of the following on your phone screen:
- Payment successful, or
- Payment declined
If a payment fails, you can cancel it, try again, or switch to a different payment method (if you also have a WisePad 3 connected).
Step 5: Send a receipt (optional)
If the client would like a receipt:
1. In the app, once the payment has been taken, a modal will appear asking if you'd like to send a receipt:
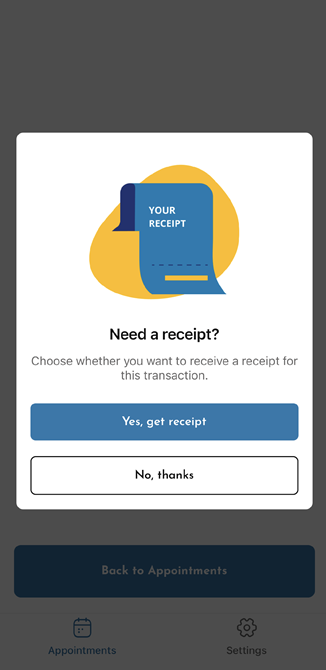
3. A receipt will be emailed automatically to the address you entered.
What happens in WriteUpp after payment
Once payment is successful:
- If the appointment already had an invoice, it will be marked as paid
- If no invoice existed, one will be created automatically and marked as paid
No additional action is required in WriteUpp.
The transaction will also appear in your Stripe dashboard.
Troubleshooting tips
If you’re unable to take payment:
- If you have multiple payment devices connected, check which is selected as your preferred payment method in the app settings.
- Make sure your mobile phone or WisePad 3 is connected in the app and ready. You can see connected devices in the app, under Settings -> Connect Stripe Reader
- Ensure your phone is connected to a reliable internet connection, either through Wi-Fi or mobile data.
- If you're having trouble connecting to Stripe after initiating a payment, fully close the app and reopen it, then try again.
- If you’re unable to start the payment from the app, try initiating it from desktop instead.
-
If a payment fails, try taking the payment again.
- If it still fails, try switching payment devices and trying again (if you have a Wisepad connected).